Paper Craft: Tutorials: Textures: Brick and Stone
There may be situations where you want to have a facade of brick or stone on the face of your project. For example, if you're building a stone wall or stone/brick building. This is a relatively easy, but time-consuming proces. Let's start by exploring some of the tools you'll want to have on hand.
Materials
Painting
Take a sheet of gray cardstock and paint it. How you paint it will have a significant impact on the apparent texture of your stone. Here is one of my common techniques:
- Strongly dilute black watercolor paint to make gray, and lightly paint the entire surface. Experiment with painting and then wiping immediately with a paper towel. This will make the gray cardstock darker, but also make it appear a bit mottled. Do not try to make the paper uniformly gray.
- Strongly dilute an ochre paint and randomly streak the cardstock with this color. Don't make these streaks horizontal or vertical to the paper; they should be at various angles. Again, you can try smearing around the ochre with a paper towel.
- Now cover the entire paper with a diluted blue. The ochre and the blue will cancel each other out creating a sort of grayish color, and where there was no ochre, the stone will have a more bluish appearance. In the image above you can see all three colors - gray, ochre, and blue.
Cutting
As your paper dries, you'll find that it curls significantly. You can try to flatten it with a heavy book, or by manually curling it the other way. Keep in mind, though, that you'll be cutting this paper into small rectangles and gluing it, so the curl will be flattened by the glue.
Decide on the dimensions of your stone, and use your paper slicer to cut the paper in strips of the right height, and then cut each strip into rectangles of the right width.
Gluing
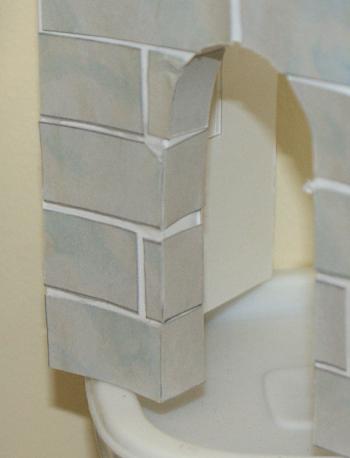
Use a good adhesive to put the stones in place on a sheet of cardstock (I recommend using gray cardstock - gray works well for a mortared appearance) leaving a bit of space between each rectangle. If there are openings (such as windows), don't try cutting the rectangle to fit the window until after you've glued it down. Then you can turn the project over and trim off the excess from the back side. Also, if (as in the image above) you have a window frame to brick in, trim with a little bit of overhang (about the depth of the cardstock) so the frame pieces will slide in behind to make a nice corner.
Examples
Here are a couple more examples. One of these has a stronger blue tint, and the other was an experiment in creating a more heavy-handed texture. I don't like it as well, but I thought it was an interesting experiment. Play around until you find something you like!


