Paper Craft: Tutorials: Spacers: Parallel Spacer
If you're creating three dimensional models from card stock or pasteboard, you will likely find yourself in a situation where you need to have two sheets of card stock separated by a specific depth (for example, the outside and inside of a wall). For this situation, a spacer is a handy thing to have. This is a simple cube, except that instead of closing it, the bottom is splayed out and attached to one of the surfaces. The top can be glued to the other surface, or it can just rest against it, depending on the application. You will want several of these if you have two large surfaces which need to be held at a constant distance.
Also, be sure to check out our instructions and templates for other types of spacers.
Instructions
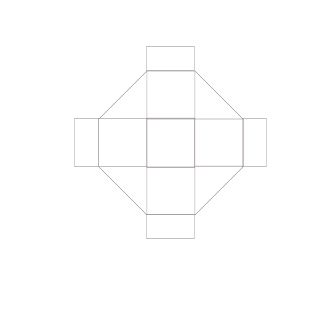
- Print the printable template on cardstock (scale the print size for smaller or larger spacers)
- Using scissors or a knife, cut along the outline of the image. Note that if you are limited on space, you don't need all four of the bottom tabs splayed out; you can cut some of them off; use discretion based on your application.
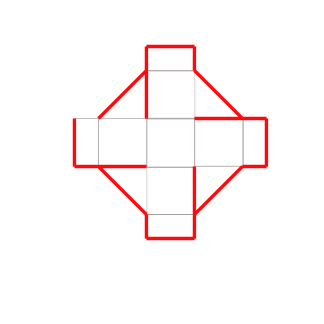
- Use the redline template to identify which additional lines need to be cut (red).
- Using your knife, carefully score (but do not cut through) the remaining lines which have not yet been cut.
- Fold each scored line to 90 degrees. The diagonals should be folded back, while the outer lines should be folded forward.
- Using your craft adhesive, glue the four tabs behind the adjacent uprights.
- Glue the four bottom tabs to the bottom surface.
- Optional (depending on the application): Glue the top to the other surface.


