Paper Craft: Tutorials: Metal Temporary Corners
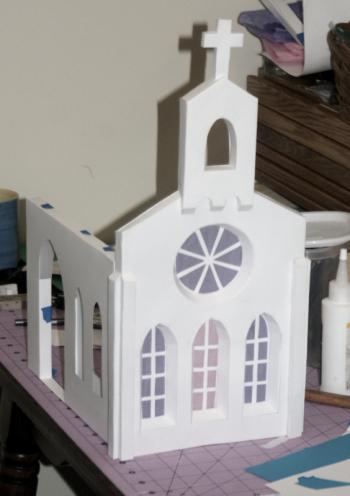
I am currently working on a rather large structure (shown in the image here). The facade of the church is actually larger than an 8.5 x 11 sheet of paper. A project like this takes a lot of space in storage, unless you can collapse it and lay all the walls/roofs flat. Having a fully collapsible model is a challenge, and I've tried several different ways of creating temporary corners that are easy to set up and tear down as needed. Some experiments were just made out of paper (effective, but not solid), some were made out of paper and popsicle sticks (more solid), some were made from paper and velcro (really didn't work well). I finally came up with two solutions. One was the keyhole corner (which is solid, and uses gravity to hold the corner together, but is more time consuming to build), and this one, which is quick and easy to build, but doesn't hold the corner together quite as firmly. This corner has a bit of "wiggle room" in the joint, so I use it when I'm in a hurry and not working on a "finish" model.
Materials
Here is what you'll need to build a metal temporary corner:
- Card stock paper
- Pencil
- Scissors, paper trimmer, or craft knife
- PVA adhesive
- Small corner braces
Note: The measurements below are based on the assumption that you're using the corner braces recommended above. If you use different braces, you'll need to tweak the measurements a bit. Also note that I wouldn't try building this with other glues. The PVA has just the perfect mix of permanence and flexibility.
Instructions
In these instructions I reference "walls," under the assumption that you are building a house-type structure, and want to join two walls at a corner.
You are going to create two "sleeves" which slide over the ends of a corner brace. The building of the sleeves is easy, but takes a lot of time because you have to wait for a puddle of glue to dry. Therefore, I recommend building a bunch of these at once, after you've tried it out and know that you understand the procedure*.
STEP ONE: Cut two rectangles from the card stock. These are the sleeves. These should be 1" by 3". Note that 3" is longer than you actually need, and you can trim off excess when you're done, but the next steps are easier if you have some extra cardstock to hold.
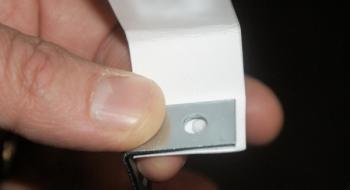
STEP TWO: Place a corner brace so one of its edges lies along a 1" edge. Be sure that the long edge of the paper presses up against the inner corner of the brace.
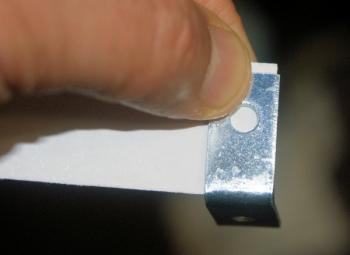
STEP THREE: Use your pencil to trace the inner contour of the hole in the brace.
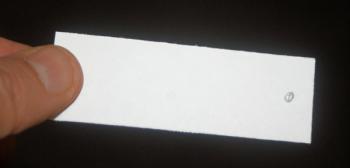
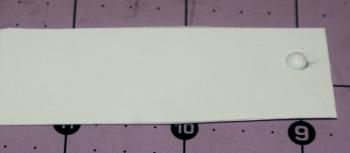
STEP FOUR: Remove the brace, and squeeze a dollop of PVA glue onto the circle you just drew. The purpose of this puddle of glue is to create a bump that will extend into the hole on the brace, making it harder for the brace to slide in and out of the sleeve. TIP: The puddle should be wide, but not tall; if your puddle is taller than it is wide, use the applicator of your glue bottle to press the top down and spread it out a bit.
Let this rest until it is fully dry. While you are waiting, you can repeat steps two through four with the second rectangle you cut. The two dollops of glue need to dry fully, and that can take awhile, so plan on walking away from the project for a few hours.
STEP FIVE: Once the glue puddle is dry, lay the brace back on the rectangle so the hole lies over the bump created by the puddle of glue. IMPORTANT: The outside of the brace's angle has square edges, while the innside has rounded or beveled edges. It is very important that you always place the beveled side againts the glue bump. If you get this backwards, the sharp edge of the brace will likely tear the glue from the paper.
STEP SIX: Wrap the rectangle around the brace. This will create soft creases in the paper. Don't wrap the paper too tightly; you want to have a little bit of a gap to give your brace room to slide over the glue bump. Glue the sleeve together. You can do this with the brace inside the sleeve; try not to get glue on the brace, but if you do, it probably won't stick to the metal, so it will hopefully be okay. Do this for both rectangles. You can trim off excess cardstock once the sleeve is glued.
STEP SEVEN: Once the glue is fully dry, test to make sure you can pull the brace out through the sleeve. The glue puddle will make it snug, but since the glue is flexible, you should be able to pull it in and out with a little bit of pressure. It may help to squeeze the sides of the sleeve to pull the glue away from the hole in the brace. If you can't pull the brace in and out of the sleeve, you made your glue puddle too large, or you made your sleeve too tight - back to the drawing board you go!
STEP EIGHT: Once you've verified that both sleeves are functional, slide both of them over the same brace (remembering that the glue bump goes against the beveled side), and put glue on the outside surfaces. Put your two walls together as you want them to be joined, and press the entire construction (brace and sleeves) onto the walls.
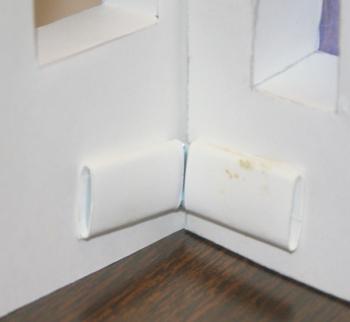
STEP NINE: Once the glue is dry, you can pull the brace out of both sleeves (do this one at a time) and you'll have a fully detachable/reattachable corner. Depending on the situation, you might want to have two of these - one at the top and one at the bottom.
* Mass Production: If you have a paper trimmer, You can quickly dice a single sheet of 8.5x11 cardstock into 24 rectangles. It'll then take you a minute to mark where to put the glue on all of them. Drop the glue on, and head for bed. The next morning you'll have 24 sleeves (12 corners) dry and well on their way to completion!
Variations
- These could be built on either inside corners (90 degrees) or outside (270 degrees), depending on which you want to be hidden from view. If you want to do an outside angle, you might need to get larger braces, depending on the depth of your wall.
- If you need an angle larger than 90 degrees (such as the angle between a wall and a roof), that's also possible. If, for example, you need a 120 degree angle, build a 30 degree spacer (because 90 + 30 = 120) and add the spacer on to one wall. Attach your temporary corner to the spacer instead of the wall. Instructions on building a variety of spacers can be found here: Spacer tutorials.
- Are you looking to do this for an angle less than 90 degrees? I haven't come across that situation yet, so haven't worked out a solution. If I do, I'll post it here.


